TUTORIAL VIDEOS

PLAYTEST ACCESS
B. To verify your test group:
-
Log into your Crowfall.com account, then mouse over your username at the top right of the home page. Click ACCOUNT to open the Account page.
- Click BACKER REWARDS from the menu on the left. Scroll down to find the “Group” entry.
- If it shows Beta 3 or later, you do not have playtest access at this time. You may either upgrade your pledge package (look for packages in the Crowfall Store that are marked “Early Access”) or wait for your test group to be activated in the future.
QUICK START GUIDE
Here are the recommended first steps to begin your Crowfall adventure. Continue reading to learn more about each.
CREATE AN ACCOUNT
A. Click REGISTER at the top right of the crowfall.com home page to open the Registration page.
B. Complete the form by filling in the information requested for each field. These login credentials will be used for the Crowfall website, forum and game.
C. Note that the username you select will be visible as your username on our forum.
D. Also note that a pledge package is required to post on the Crowfall forum; however, for the first 30 days after registration, anyone without a pledge package may post in the“Welcome to Crowfall” forum.
E. Click ACCOUNT to open the Account page. Here, you can view and modify information about your account including set up or removal of two-factor authentication (2FA), send and receive gifts and set your forum badge preferences.
DOWNLOAD AND INSTALL THE GAME
A. To download the game, log into your crowfall.com account and go to https://crowfall.com/client/. (If you are not in one of the activated test groups, you will not be able to download the client.)
B. Click the green button marked GET DOWNLOAD LINK
C. You will be presented with two separate download options: LIVE PATCHER DOWNLOAD and TEST PATCHER DOWNLOAD.
- LIVE PATCHER - The LIVE environment is where you’ll find the game running 24/7. It includes all the regular features: the Skill tree, Eternal Kingdoms and Campaign Worlds. LIVE represents the more polished version of the game. This environment will be updated less frequently, but will also be subject to fewer bugs and outages than the TEST environment. If you want a more stable, 24/7 experience, play the LIVE environment.
- TEST PATCHER - The TEST environment is a rougher version where new features will appear first. You’ll see more frequent patches that are in a more unrefined state than the patches for the LIVE environment. You should also expect more resets here, and when this happens access will restart with Pre-Alpha 1, then Pre-Alpha 2, and so on. The TESTING environment’s schedule will be in flux; we’ll likely bring it up whenever we have a new patch that needs a larger frame of testing than we can provide in the office. If you’re okay with a more unpredictable playing experience and want to be on the front lines of testing the newest features, use the TEST environment.
NOTE: You may choose to download both patchers, but be aware that these are completely separate. must be installed individually and will only work for the corresponding server.
D. Click the green DOWNLOAD button for the desired patcher. It will download a zipped folder. The client doesn’t have to be downloaded into a specific folder, it can be on your desktop or even on another drive.
E. Unzip the folder to the location of your choice. We suggest a new Crowfall folder on your desktop for faster, easier access. Often, the default location of the download will be C:\Program Files (x86).

LOG IN
A. In the Crowfall folder, locate the application called “CFLauncher.exe”. Right-click and select “RUN AS ADMINISTRATOR”. This will prompt you to use your login credentials. If you have chosen not to use two-factor authentication (2FA), leave that field blank. Click OK to begin the patching process.
B. When patching is complete, press the green button with the arrow at the bottom right corner of the patcher window to enter the game. It may take a few moments for the game to load.
C. Upon successful login, you will enter the Lobby. Use the menu on the left to navigate to different features of the game (some of which are described more fully in this guide):
- Enter a WORLD – A list of active Campaigns and Kingdoms will appear. (See more on Campaigns and Kingdoms below.)
- Train SKILLS – In Crowfall, training occurs at the account level. (See more on Skills below.)
- Watch training VIDEOS – This collection of videos will provide basic information about various character classes and game features. We also recommend that you visit the Official Crowfall YouTube channel for more videos.
- Change your SETTINGS – Here you can make adjustments to Graphics, Audio and Input.
- Import PURCHASES – In-game assets that you have purchased in the Crowfall Store or that were included in your pledge package rewards may be imported into the game for use in your Eternal Kingdom. These items cannot be used in Campaign Worlds. (Find more information about Importing Purchases below.)
- Chat – The chat window appears in the lower left of the screen. You may either click the Chat window with your cursor or hit ENTER to activate the Chat window. This will place your cursor into the text field where you can type messages to interact with other players. Hit ENTER again to send the message. Tabs across the top of the Chat window display the channel names. Learn more about Chat commands in this article.
TRAIN SKILLS
A. In Crowfall, training occurs at the account level, and many skills will be applicable to multiple characters.
B. Skill trees are divided into two main categories: Universal and Class skills. You may train one Universal skill and three Class skills at the same time. Skill training continues even when you are offline.
C. To begin skill training from the Lobby, click SKILLS from the left-side menu. Learn more in the Skills FAQ.
CREATE A KINGDOM
A. Every Crowfall account has a personal housing area called the Eternal Kingdom (EK). All of the characters on your account will automatically have access to your EK.
B. You may craft items such as land parcels, buildings and palisades for use in your EK, or you may purchase them from the Crowfall Store.
C. To import items from the Lobby your account into the game, click PURCHASES to bring up the list of assets available to you. Click each individual asset you’d like to import to your Spirit Bank.
D. To create your Kingdom:
- Click WORLDS
- Click KINGDOMS
- Click CREATE KINGDOM
- Click START UP KINGDOM
- Click ENTER WORLD
E. When you enter your EK, you will first need to CREATE A CHARACTER. (See more on this below.)
F. Once your character is loaded into the EK, hit the S-key to open your Spirit Bank. (This account-level bank will be shared by all of your characters.) Your Spirit Bank will display all of the assets you imported. Right-click the deeds to import them from the bank into your Inventory. It takes about two minutes for items to imported and available for use. Look for the small red X in the upper left corner of the icon of your imported item(s). When the X disappears, this item has successfully imported.
G. To use Parcel Deeds to expand the size of your EK:
- Add parcels to increase EK size – From your EK, hit ENTER to bring up the Edit Kingdom interface. Parcels that are available to you will appear below the EK Design Grid.
- Drag and drop parcels onto the grid and arrange them to your liking. They will be automatically stitched in place after you click SUBMIT.
- Hit the M-key to bring up the in-game map of your EK.
H. To place building assets in your EK:
- Hit the S-key to open your Spirit Bank.
- Right-click the building asset deeds to import them from the bank into your Inventory. It takes about two minutes for items to imported and available for use. Look for the small red X in the upper left corner of the icon of your imported item(s). When the X disappears, this item has successfully imported.
- Hit the I-key to open your character’s inventory. Right click a building or asset deed to select it for placement.
- A transparent image of the building will appear in the game world. If it is red, the building cannot be placed there. When the image is blue, the building can be placed with a left-click of your mouse.
I. You can also “snap” wall pieces together using SOCKETS. These are BLUE rectangular connectors that appear in Building Placement Mode.
- Right-Click a Castle Wall deed in your Inventory to place it. Target that piece near another Castle Wall piece in the 3D world and overlap the SOCKETS to snap these pieces together.
- If the target location is valid, the Wall will appear BLUE. If not, it will appear RED. If the placement will successfully Socket this piece to another piece, it will turn GOLD.
- Left-click the mouse to place it.
- Hit the ESC key to cancel placement.
- To remove a wall segment or building, run up to it in the game and hit the L-Key to turn it back into a deed.
J. Other EK settings – From your EK, hit ENTER to bring up the "Edit Kingdom" interface. Here, you can change the name of your EK, toggle on/off Public or Private (default is Private) and toggle on/off PVP (default is Off).
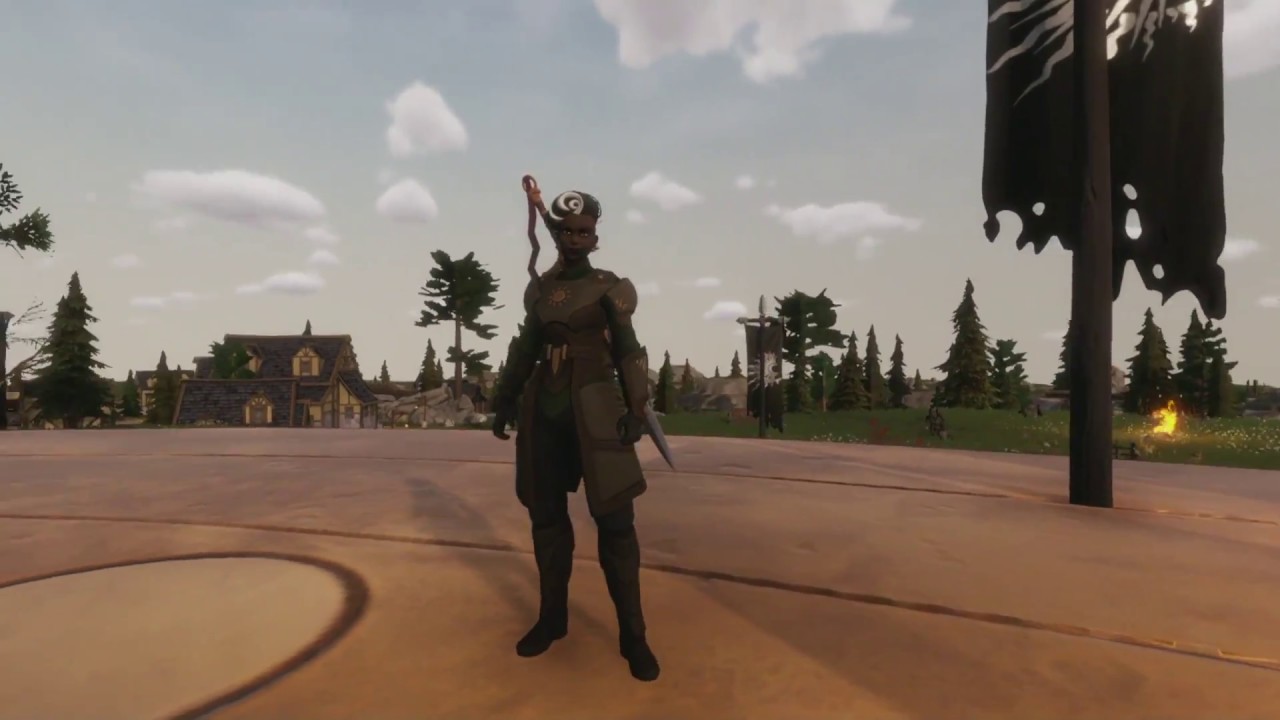
CREATE A CHARACTER
A. When you enter the game, you will appear in Crow Soul form at a temple. Fly up to one of the smaller statues and hold down the F-key to create an avatar of that class. (See the Crows and Vessels FAQ for more information about this game system.)
B. During character creation, you will be able to name your character and customize its appearance.
C. New characters enter the world without equipment. (See the HARVESTING and CRAFT WEAPONS AND ARMOR sections below to learn how to outfit your character.
D. Here are the basics for character movement:
- Use WASD to move. Hold SHIFT to sprint, which will use stamina.
- Use the left mouse button to do a basic Attack. Click 3x for your basic attack combo chain.
- To transition between Combat Mode and Out-of-Combat Mode, use the Z key.
- Use right mouse button to either Dodge or Block (depending on Class).
- In the upper left, you will see a meter for Health, Stamina, Power Resource and Food.
E. If you die in the world, you will appear at Temple in spirit Crow form.
- You cannot leave the area of the Temple as a Crow.
- If you wish to retrieve your corpse, fly to the foot of the enormous Colossus statue in the middle and hold F key to summon your corpse (and any items that were not looted).
- If you wish to abandon your corpse (and all of your lost items), you can fly to one of the smaller statues to create a new avatar of that Class.
F. You can transfer items to all of the characters on your account using the Spirit Bank.
- To open the Spirit Bank, hit the B key while inside any game world.
- Right-click (or drag) items from your inventory into your Spirit Bank to move them to other worlds.
- Items do not move instantly between your inventory and your Spirit Bank. While an item is in transit, a small red X will appear in the upper left corner of the item’s icon. Once that X disappears (after about two minutes), the transfer is complete.

POWER TRAY
The Combat Powers tray is located at the bottom of your screen. The tray will be empty when you create a new character, so you'll need to load it out.
A. To load out Powers:
- Hit K-key to bring up your Powers Loadout.
- Drag any power from the upper left to the power bar to load it out. You get powers from your Race, your Class and any equipped Disciplines. (See more on Disciplines below.)
- The purple icons are Passive Powers. These are effects that give you benefits automatically. (You don’t have to do anything other than load them out!)
- You can load out up to three Passive Powers by dragging them into the Passive Power slots on the combat tray.
B. To use Powers:
- Hit the corresponding number key for that power (1 through 0).
- Powers have cooldown timers. Once used, the icon will be grey until that power can be used again.
- Every Class has a unique set of Powers. Some Powers require the use of Health, Mana or Stamina, and others will have a mechanic unique to that Class.
- To shift between Combat Mode and Out-of-Combat Mode, use the Z key.
- With a weapon equipped, you will now be able to use your Combat Powers.
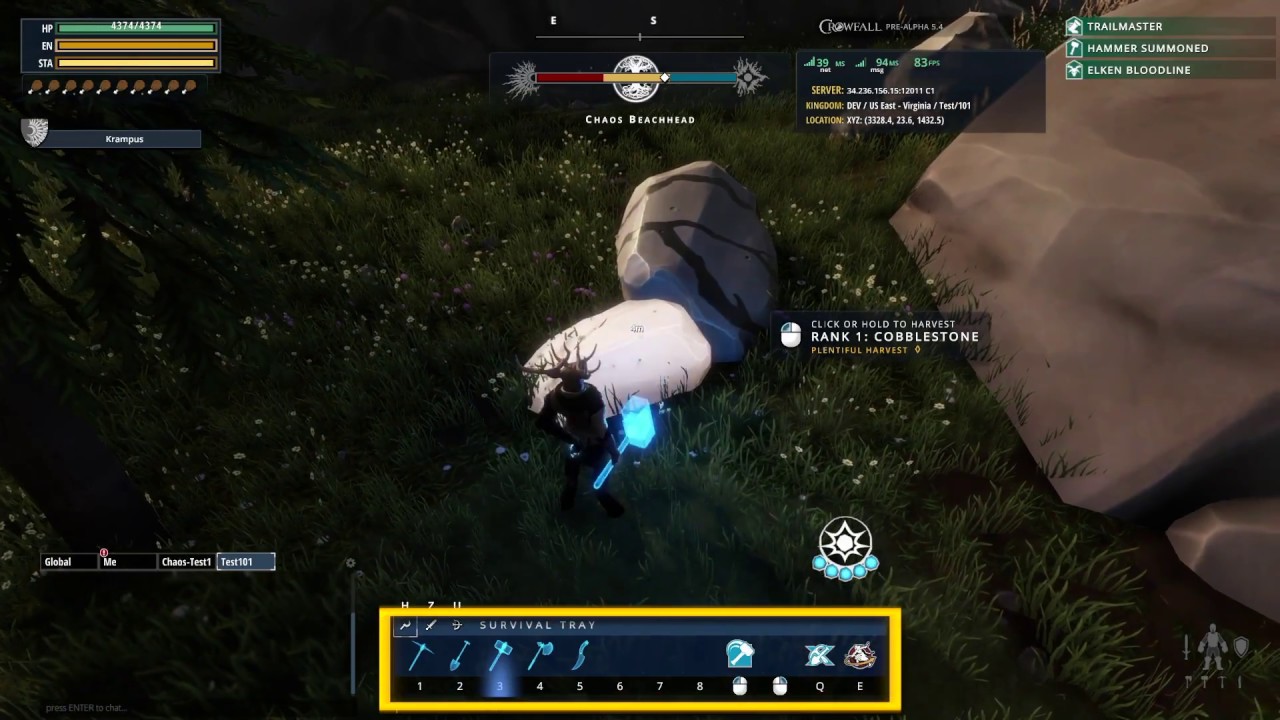
HARVEST RESOURCES
A. You will be unable to use your Powers until you find or craft a weapon. Harvest resources to collect the materials you'll need for Crafting.
B. Your new character has a runestone axe that will be automatically summoned when you approach a tree and press the F-key to begin chopping it. As you chop the tree, wood will spawn in the world. (We call these resource drops "doobers".) Walk over the doobers to collect them.
C. There are different types of resources to be harvested:
- Wood may be harvested from trees with an axe
- Stone may be harvested from rocks with a hammer.
- Ore may be harvested from rocks with a pick.
- Hides may be harvested from animals with a knife.
D. Basic resources may be gathered in EKs. Better, higher-quality resources may be found in Campaign Worlds. The more advanced the campaign, the better-quality resources.
CRAFT WEAPONS AND ARMOR
A. Use the J-key to open the Crafting interface.
B. Click categories in the left-side menu to expand the Crafting menu for a list of recipes.
C. From your inventory in the lower right, right-click or drag items into the resource slots, and click Combine.
D. Follow the on-screen guides to complete the crafting process.
E. To equip your character:
- Open the Equipment Window using the P-key. Mouse-over the Weapon Slot to see what kind of weapon this Class uses.
- Open the Crafting Window using the J key.
- Find the recipe for this weapon in the Basic Weapons recipe list.
- Harvest the Wood + Stone + Metal that you will need to create a weapon of this type.
- Craft the Basic Weapon and equip it by opening the Equipment Window (P-key) and right click or drag that icon to the weapon slot.
- With a weapon equipped, you will now be able to use your Combat Powers.
- The same process may be used to create armor.
F. Advanced items are crafted from components. You must craft these components using raw materials (such find these in various sub-categories such as Weapon Components and Armor Components.
- Using different resources in a recipe will give different results. For example, using a Gold Metal Bar to forge a weapon will give different attributes than using a Silver Metal Bar.
- Materials can also be mixed to combine these effects. For instance, Gold and Copper can be fused to create a Rosegold Metal Bar, an alloy that will provide different attributes than using just Gold or just Copper.
- Resources have both a type (such as Copper Ore, Gold Ore, or Tin Ore) and a rarity/quality level (white for Common, blue for Uncommon, orange for Legendary).
- The type of material (Gold, Copper, Tin) will determine which attributes (durability, critical hit chance, damage, etc.) of the crafted item will be improved.
- The quality level of the resources affects how much those attributes will be increased.
ADD DISCIPLINES AND RUNESTONES
A. You can use Disciplines to customize your character. These are basically sub-classes that grant additional skills, powers and even equipment slots.
B. Each character can have two Major Disciplines and three Minor Disciplines.
C. To craft a Discipline Runestone to equip a Discipline:
- Hit the J-key to bring up your Crafting Menu, then scroll to Discipline Runestones at the bottom.
- Once you have crafted the Discipline Runestone, use the P-key to open your Equipment screen, then click the Runestones tab on that screen to reveal your Runestone slots.
- Drag the Discipline Runestone to one of your Runestone slots to equip that Discipline.
D. Check your Power Loadout (K-key) to see what new powers were granted by this Discipline.

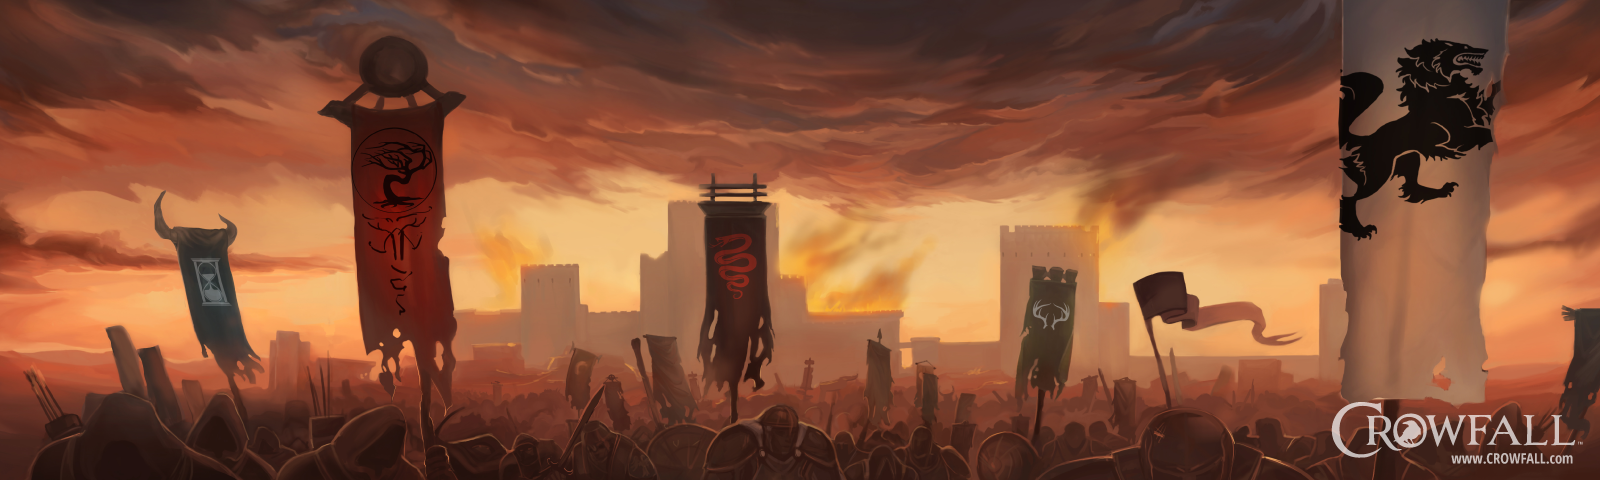
JOIN A CAMPAIGN
A. Campaign World testing began in Summer 2017 with an experimental Campaign called “Tug of War”. Click here to read more about Tug of War and our future plans for Campaign Worlds.
B. We strongly suggest that you spend time in an EK creating equipment for your character before you enter a Campaign. Items equipped directly onto your character or in your character’s inventory will not transfer from one World to another. Remember to store items in your Spirit Bank so that they will be available to you across Worlds.
C. In this World, the Spirit Bank will no longer allow you to move infinite resources in and out. For this campaign, we’ve set the import and export counters to 10/10.
D. To enter a Campaign, go to the Lobby and select WORLDS from the menu on the left. A list of available Campaigns will appear on the right. Select the Campaign you wish to join and click ENTER WORLD.
E. You will be prompted to select a faction: Chaos, Order or Balance. This will be your faction for the duration of the Campaign. All vessels on your account will be tied to this faction. There is no friendly fire. You cannot attack other members of your faction.
F. Click CONFIRM. Allow a few moments for the world to load. You will appear in the game in Crow Soul (spirit) form at a Temple. Fly up to one of the smaller statues and hold the F-key to create an Avatar of that Class.
G. If you have stored inventory in the Spirit Bank, hit the B-key to open your Spirit Bank and begin the process to transfer those items to your character’s inventory. It takes about two minutes for items to imported and available for use. Look for the small red X in the upper left corner of the icon of your imported item(s). When the X disappears, this item has successfully imported.
H. Hit the I-key to open your character’s inventory. Right-click weapons and equipment to pop them into the appropriate slots on your character.
I. The “Tug of War” objective is for your faction to claim and successfully defend the greatest number of strongholds.
J. The “Conquest Slider” starts in the middle of the line. As factions gain and lose territory (i.e. gain and lose Forts and Keeps), the slider will move to the left and right.
- The left-most segment represents CHAOS.
- The right segment is ORDER.
- When BALANCE wins or loses, the slider can move in either direction, depending on which faction captured it.
K. Victory Conditions for “Tug of War”:
- CHAOS wins by ending the game with as many strongholds as possible.
- ORDER wins by ending the game with as many strongholds as possible.
- BALANCE wins by ensuring there is no clear winner between ORDER and CHAOS.